Change request implementing must be planned and scheduled carefully. It is very significant for the successful request implementation. Also, planning and scheduling allows minimizing vital business functions disruption.
When scheduling the change request implementation, it is recommended in the case of time overlaps, to minimize the effect caused to the multiple services or CI's at a time when implementing.
It is a good practice to follow the rule: "One timeframe - one change request."
Scheduling and Planning
To schedule a change request, please complete the following steps:
- In the Planned tab, enter a date and time when the request has to be started and finished processing into the appropriate fields (Planned Start Date and Planned End Date).
- After the request was processed, enter the actual date and time into the appropriate fields (Actual Start and Actual End).
To plan a change request, fill in the following fields in the Planning tab:
- Preparation - describe the process of pre-implementing testing.
- Core Activities - describe the process of the change request implementation.
- Validation - describe the process of post-implementing testing.
- Backout - the plan of activities to rollback the system or service or CI condition to its previous state, in case of failed implementation.
All these fields are mandatory.
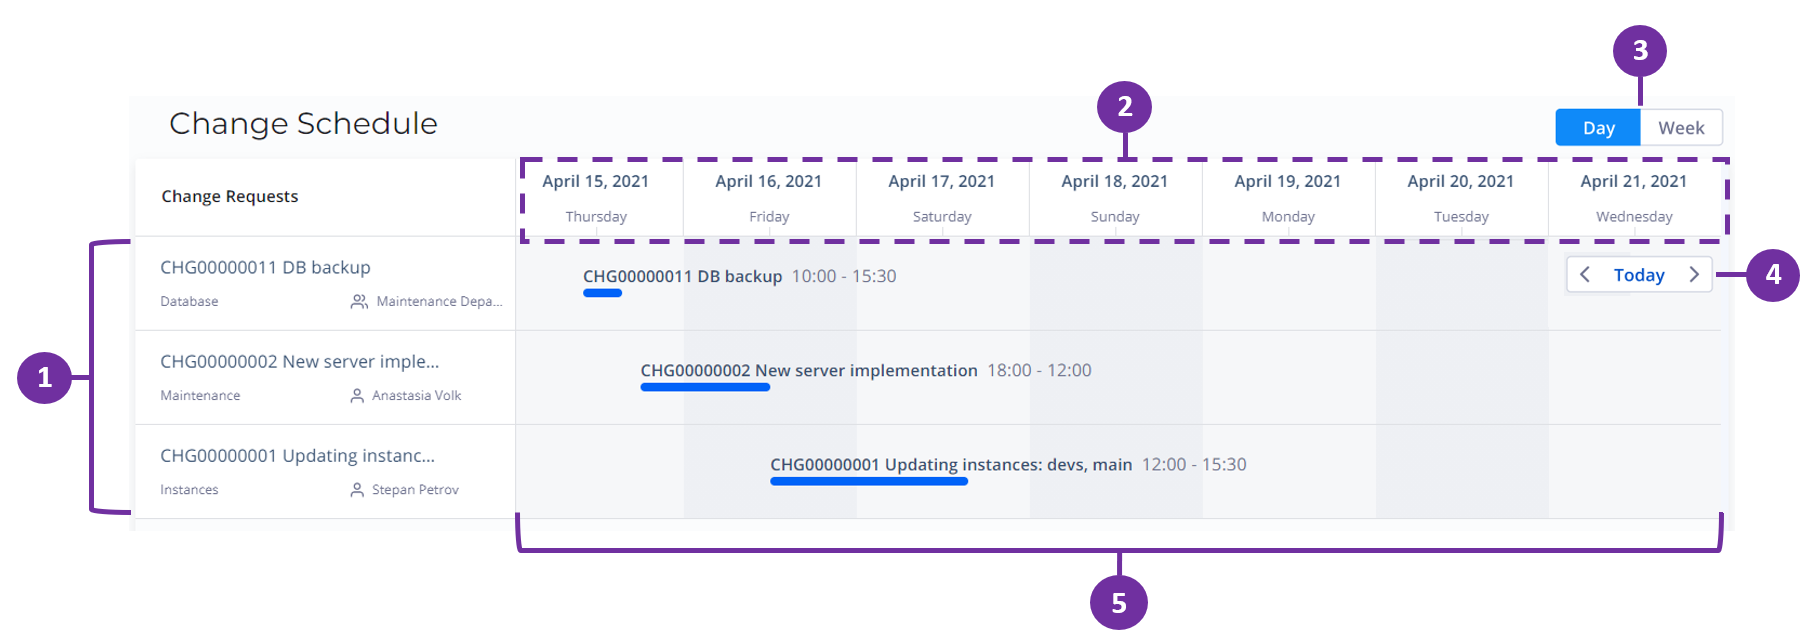
Change Schedule interface
Change Schedule page
To check out the planned changes, navigate to Change Enablement → Change Schedule.
Change Schedule includes change request records in the following states: Authorization (approved and not defined), In Progress. Change requests in other states and requests with denied approvals will not be displayed.
Change Schedule consists of the following elements:
- Change Requests list – displays the title of a record and information about the assigned user and service.
- Timeline Scale – displays dates or dates and hours depending on the selected View Type.
- View Type – defines the range of time displayed. When Day is selected, then the Scale displays hours and dates. When Week is selected, the Scale displays dates without hours.
- Navigation – provides navigation through the timeline. Click Today to get to the current date and time.
- Timeline – displays the duration of a scheduled change in proportion to the Timeline Scale.
Change Schedule on a form
To open the Change Schedule, perform the following steps:
- Navigate to Change Enablement → All.
- Open the record you need or create a new one.
- Scroll down and open the Schedule tab, fill in the fields if needed.
- Click Change Schedule.