When you create a page, you can make it available on the portal. To do this, you need to create a portal node that will bind your page with the portal record.
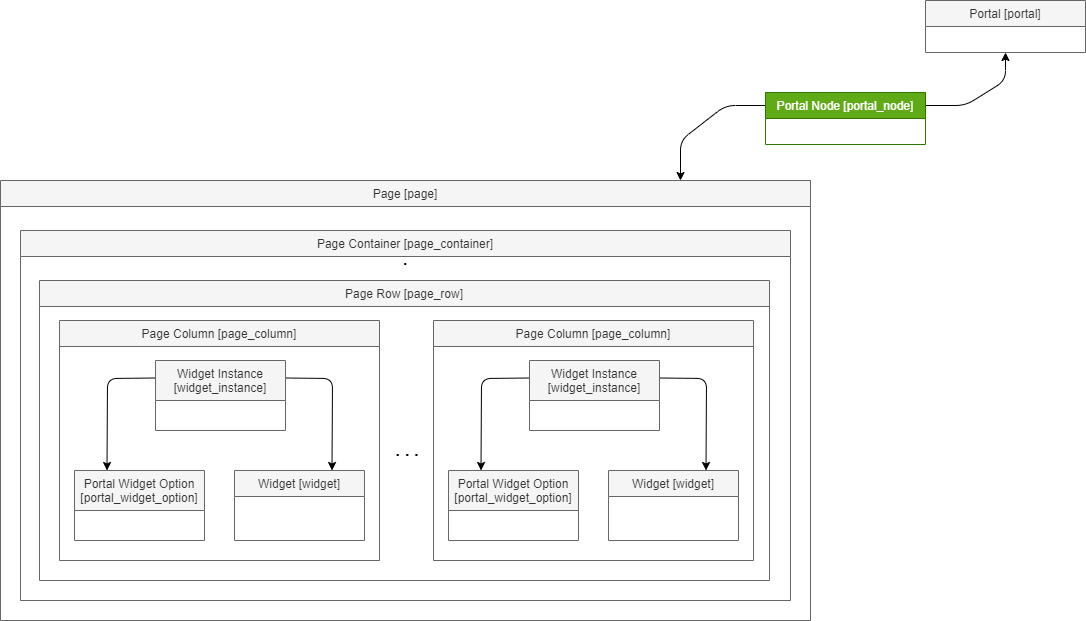
The following diagram illustrates a typical portal structure:

Integrate a page into a portal
To integrate a page into a portal, you need to complete the steps below:
- Create a portal record.
- Create a portal node.
- Create a page.
You should consider the portal structure first before configuring. It should have at least one portal node and at least one page to work properly. Otherwise, it will not display correctly.
Create a portal record
Create a portal record, so you will be able to bind a page, its elements, and a portal node to it.

To create a single portal, complete the steps below:
- Navigate to Portal Structure → Portals.
- Click New and fill in the fields.
- Click Save or Save and Exit to apply the changes.
When filling in the Path Name field, keep in mind that this is the URL suffix of your future portal, so fill in this field carefully.
Create a portal node
Within the portal node, there are two various essence types used to configure the portal structure:
- Portal nodes are massive structural components defining layouts of portals, categories, and pages through the Page field.
- Categories and items are pages that bind child objects based on the same features. Categories are any structures based on parent-child relationships, e.g., Knowledge Base with categorized Articles in it. Portal Nodes help implement ready-to-use structures into the portal structure.
To create a portal node, complete the steps below:
- Navigate to Portal Structure → Portal Nodes.
- Click New and fill in the fields.
- Click Save or Save and Exit to apply the changes.
Configure the portal structure
To configure the portal structure, you need to follow these instructions:
Bind the portal record you have created and the portal node (or nodes). If you have created nodes within the portal record, it will be done automatically at the time of the creation.
To define the portal node record ID, complete the steps below:
- Navigate to Portal Structure → Portal Nodes.
- Open the desired portal record.
- The node record ID is displayed in the URL.

- Bind this node to a previously created page you want to display on the portal. Specify reference to this page in the Page field of the node record form.