In SimpleOne, configuring the list layout allows you to change the list appearance. You can create list views and configure which columns appear in the list, and define their order.
| Tip |
|---|
Role required: admin. |
List layout view
To change a list layout, complete the following steps below:
- Open the list you need to reconfigure.
- On the list, go to open the hamburger menu
and select Configure → List Layout to open the List layout configure menu.
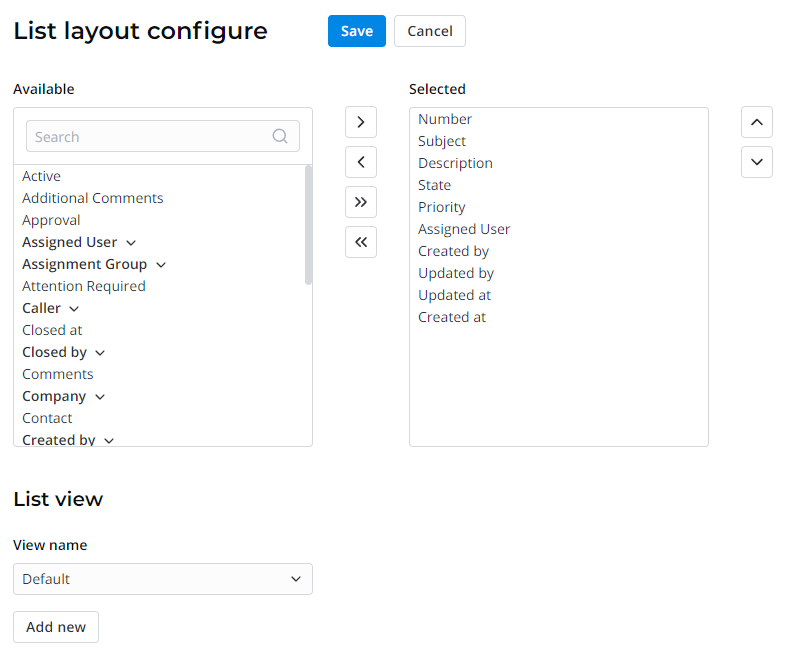
- Configure your list view with the Available and Selected boxes.
- Click Save to apply the changes.
| Info |
|---|
The Available box contains all the table fields that can be embedded in the list by adding them to the Selected box. Move elements by drag-and-dropping dragging them or using the
|
Elements marked with the bold font supportDot dot-walkingwithin. You can add such an element itself, or you can click on the arrow icon, browse through the hierarchy, and add one of the elements below.
| Info |
|---|
When building list layouts, keep in mind that the value in the first column will always lead is a URL that leads to the record related to this list row. |
Create a new view
In SimpleOne, you can create separate list views with different sets of columns for various tasks.
To create a separate view, complete the steps below:
- On the list, go to open the hamburger menu
 and select Configure → List Layoutlayout to open the List layout configure menu.
 - On the List view area, click Add Newnew.
- In the modal window, enter the desired view name and click Create.
- Configure the fields to display by moving them from the Available to Selected box.
- Click Save to apply the changes.
| Table of Contents | ||||
|---|---|---|---|---|
|