Change requests must be planned and scheduled carefully, which is crucial for successful change implementation. Planning and scheduling change requests allow for minimizing disruption to vital business functions.
The Change Schedule functionality helps to monitor scheduled changes and points out conflicts among overlapping implementations.
Change Schedule interface
There are two ways to open Change Schedule:
Change Schedule page
To check the planned changes, navigate to Change Enablement → Change Schedule.
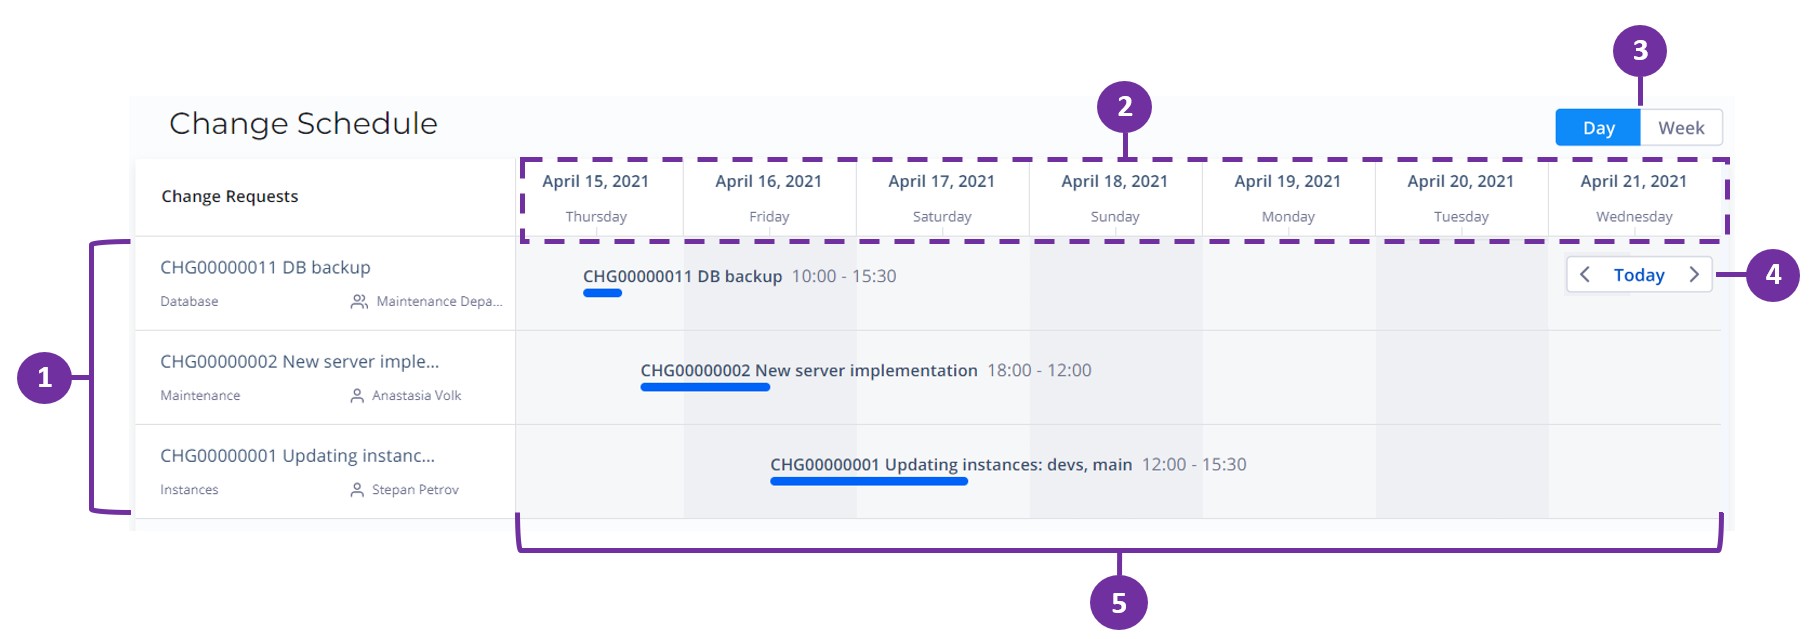
The page consists of the following elements:
- Change Requests list – displays the title of a record and information about the assigned user and service. Click the change request to open the record in a new tab.
- Timeline Scale – displays dates or dates and hours depending on the selected View Type.
- View Type – defines the range of time displayed. When Day is selected, the scale displays hours and dates. When Week is selected, the scale displays dates without hours.
- Navigation – provides navigation through the timeline. Click Today to get to the current date and time.
- Timeline – displays the duration of a scheduled change in proportion to the Timeline Scale.

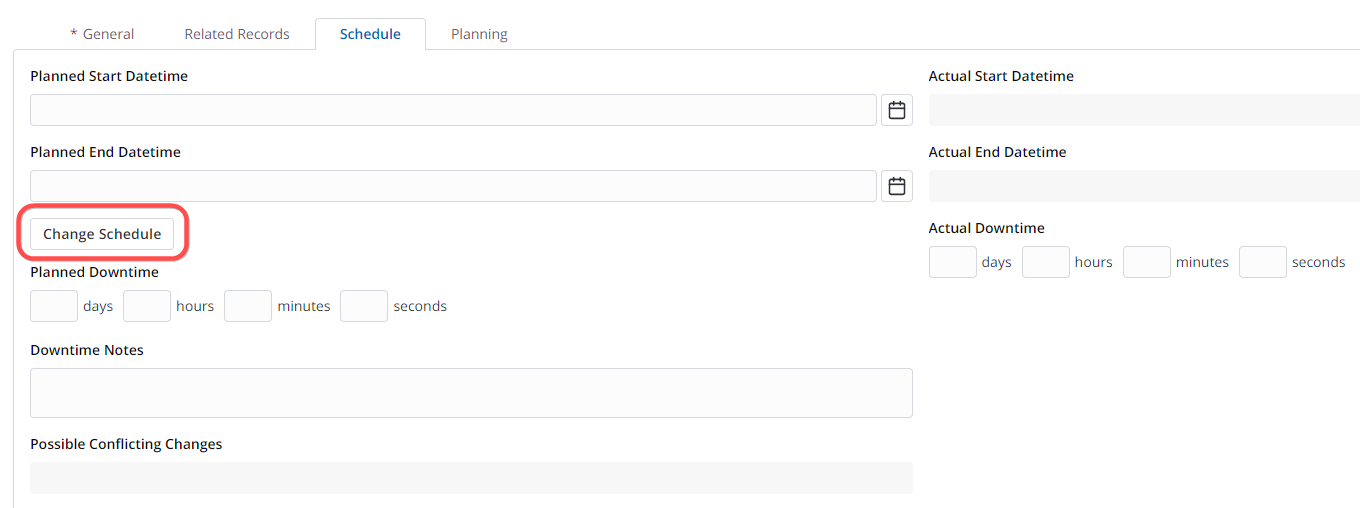
To open the Change Schedule, perform the following steps:
- Navigate to Change Enablement → All Change Requests.
- Open the change you need or create a new one.
- Open the Schedule tab and fill in the fields.
- Click

Unlike the page variant of Change Schedule, this widget contains the following elements:
- Datetime fields – change the schedule of the current record to control overlaps. Click Apply to display a new time interval on the timeline.
- Only Crossed Elements – select this checkbox to display only overlapping records. This overlap is shown on the timeline (3).
The current record is highlighted in blue color.
If the processes overlap, check information about the change requests by clicking the titles. If the processes affect each other and cannot be implemented at the same time, reschedule them.
