CRM application provides instruments for content management allowing you to save information about the content distribution channels and tags, create references from the sufccesful opportunities and track progress of all existing content on the kanban-board.
Content boards
All existing content divided into categories based on the current status is displayed on the kanban-board. Navigate to CRM → Boards → Content to open a board. You can see the board for all content or add a board for a specific selling direction.
- Content statuses.
The limit for the number of content items in one status. If the limit is exceeded, the column is highlighted with red.
- The section of the board for the contect with selected Expedite checkbox. You can see the overall amount of content in brackets.
- The section of the board for the rest of the content. You can see the amount of content with deselected Expedite checkbox in brackets.
- The displaying of a content record on the board when Blocked checkbox is not selected.
- Content name.
- Author.
- Service or product.
- SME reviewer.
- The number of days since the last change of the record.
- The displaying of a content record on the board when Blocked checkbox is selected.
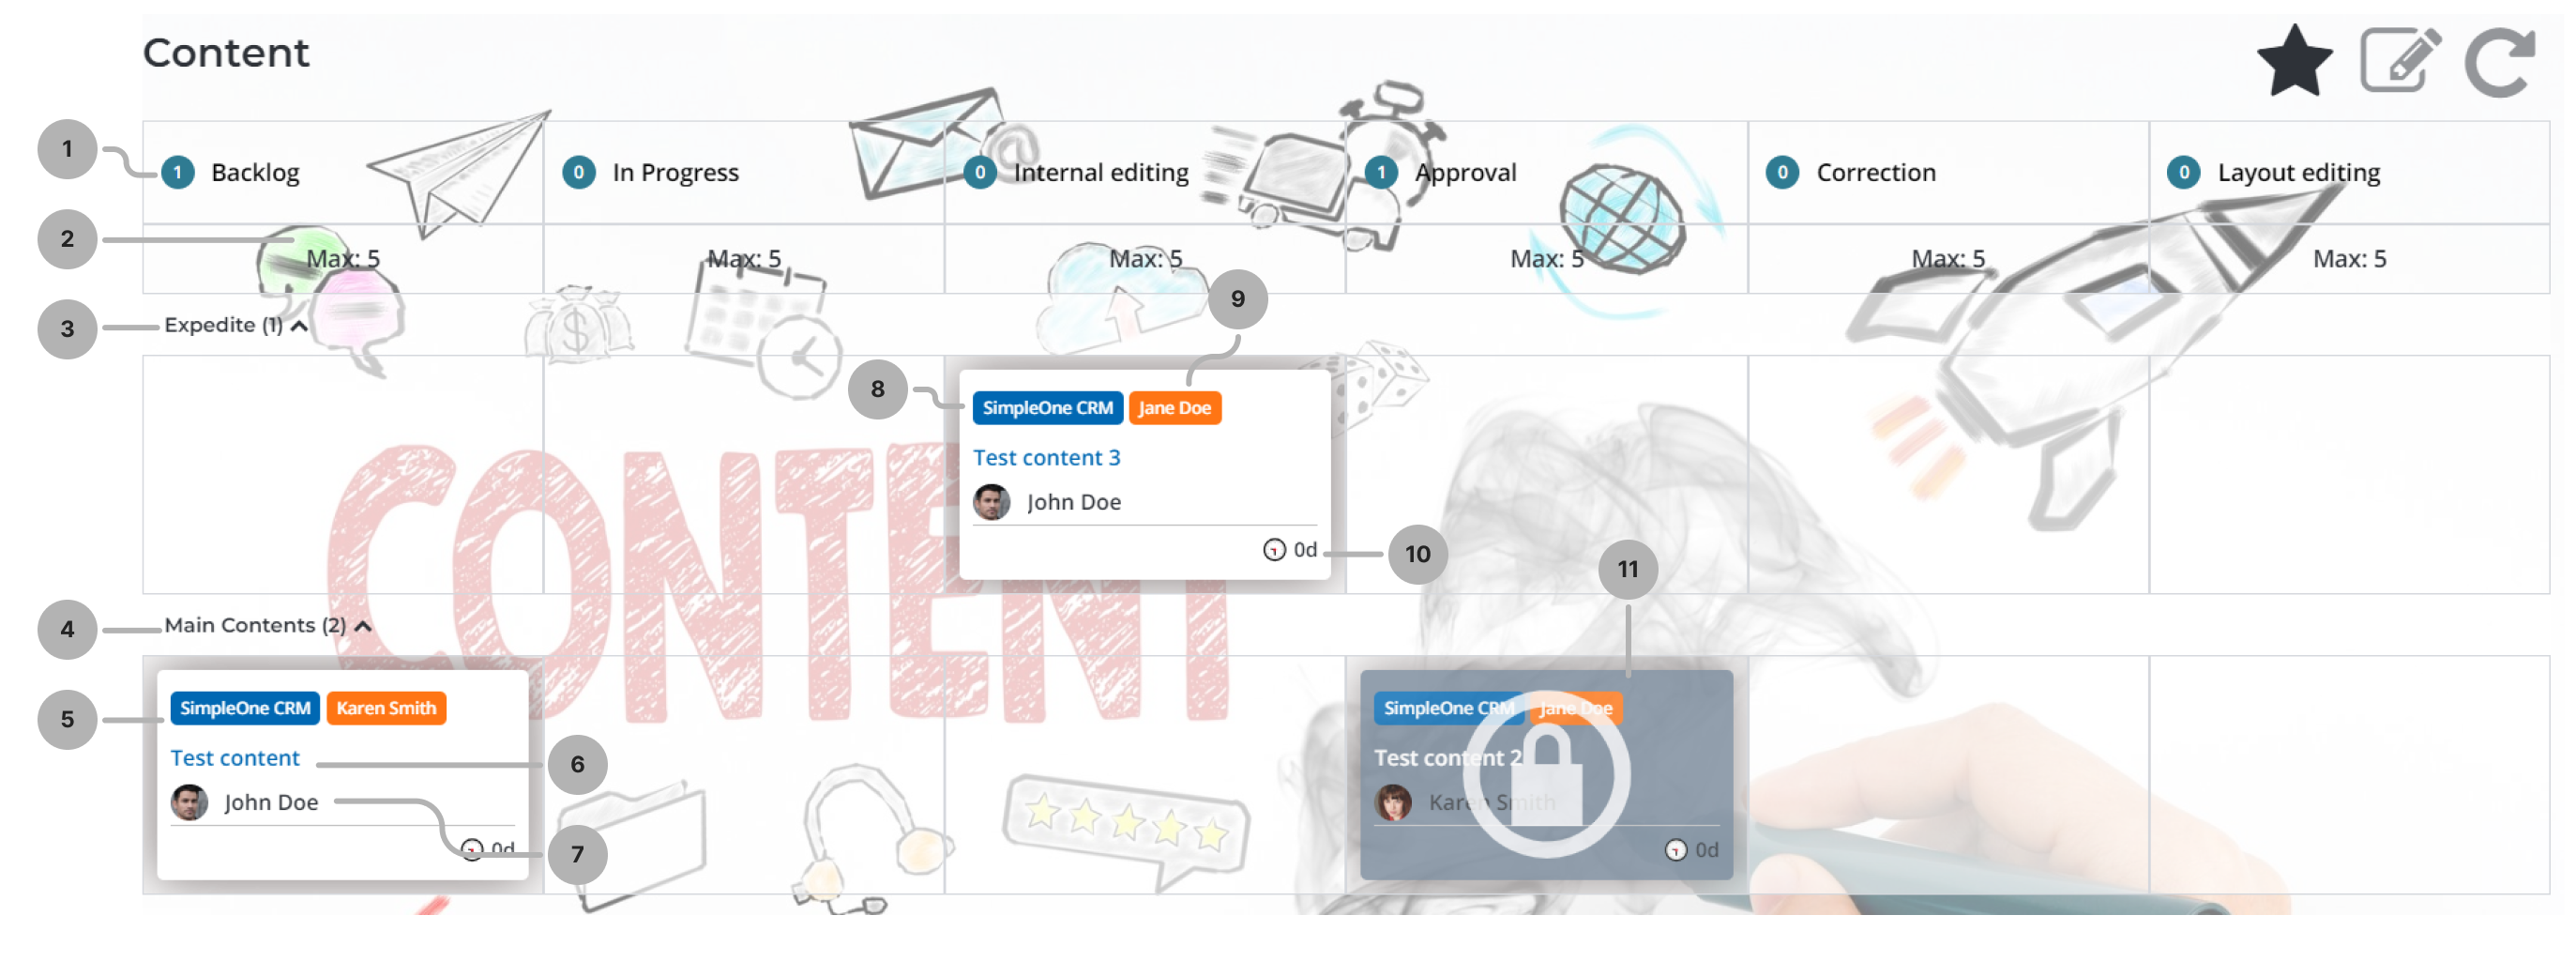
The following buttons are also present on the board:
 – adds the content board to Favorites.
 – opens board configuration, where the administrator can change the board Name, Selling direction, Background and JSON config.
  – refreshes the page.
References
References are created automatically ftom the opportunities that reached the sales stage Support and post-sale. The references allow you to save information about succesful cases to post it later on the external resources. You can also add references manually on the Reference form.
To create a reference, complete the steps below:
- Navigate to CRM → Content creation → References.
- Click New and fill in the fields.
- Click Save or Save and Exit to apply the changes.
Reference form fields
| Field | Mandatory | Description |
|---|---|---|
| Opportunity | No | |
| Opportunity.Potential customer | No | |
| Logo on the website | No | |
| Success story | No | |
| Testimonial | No | |
| Success story content item | No | |
| Testimonial content item | No |