- via the agent interface
- via the Self-Service Portal
- by converting a user query into an incident.
Create an
Incident by agentend-user Incident via the agent interface Anchor agent creation agent creation
| agent creation | |
| agent creation |
To create an incident, please complete the following steps below:
- Navigate to the Incident Management → Create New;
- Press New and fill in the form;
- Press Save.
Form description
- Incident Management → New.
- Fill in the fields.
- Click Save or Save and Exit to apply the changes.
| Tip |
|---|
You can copy the record number, title and link via the hamburger menu. To do this, click Generate link. |
New Incident form fields
| Field | Mandatory | Description |
|---|---|---|
| Number | Y |
| Incident number. This field |
| has the INCXXXXXXX format and is populated automatically. |
| Caller |
| Y | Specify the originator of the incident. The field is not displayed on the form if the Infrastructure incident checkbox is selected. | |
| Company | N | Specify the company to which the incident is related. |
| Contact Type | Y | The source from which the request is received. Available options:
When a record is saved, the field is read-only. |
| Service | Y | Specify the service |
| affected by the incident. | |
| Related CIs | N |
| Specify the related configuration items |
| affected by the incident. | ||
| Assignment Group | Y | Specify the group assigned to work on the incident. |
This field displays the works state and progress. Available choice options:
- Registered;
- Assigned;
- In Progress;
- Completed;
- Closed;
- Information Needed;
- External Processing;
- Postponed;
- Rejected By User.
More info about the state can be found here.
The way of request applying. Available choice options:
- Phone;
- Email;
- Self-Service.
The effect that the incident causes to the business. Available choice options:
- Low;
- Medium;
- High;
- Very High.
The state of needing to take action as soon as possible. Available choice options:
- Low;
- Medium;
- High.
The priority can be figured out based on its impact and urgency. Available options:
- Low;
- Moderate;
- High;
- Critical.
This field shows the level of dependency of this incident to the other incident. Available options:
- None (if the incident has neither master nor slave incidents);
- Master (if the incident has slave incident(s));
- Slave (if this incident has a master incident).
Create an infrastructure incident
There is a dependency between the Assigned User and Assignment Group fields. To learn more, refer to Restrictions for assignment.
| ||||||||
| Assigned User | Y | Specify a responsible person to work on the incident. This field is mandatory for the states In Progress, Completed and Closed.
To reassign a user or a group, use the Reassign button at the top right corner of the window, or set a new assigned user, or a group by clicking the magnifier icon next to the Assigned User field. As a result, the incident state changes to Assigned. There is a dependency between the Assigned User and Assignment Group fields. To learn more, refer to Restrictions for assignment. Later, you can reassign the incident by changing the value of this field or clicking Reassign in the upper right corner. The state of the incident will automatically change to Assigned, unless it is already in this state. | ||||||
| Subject | Y | Add a brief description of the incident. After saving, the field is hidden from the form. | ||||||
| Description | N | Add a detailed description of the incident. | ||||||
| Steps to Reproduce | N | Specify the steps to reproduce the incident. | ||||||
| Screenshot | N | Upload screenshots supporting the incident, if any. | ||||||
| State | N | Specify the work state and progress of the incident. Available options:
See the Incident process article to learn more. | ||||||
| External Task | N | Specify the task to do for the external company.
| ||||||
| External Company | N | Specify the company that works on the incident task externally.
| ||||||
Impact | Y | Measure the impact caused by the incident on the business processes. Available options:
| ||||||
| Urgency | Y | Specify the urgency of the request. Typically, it is evaluated based on the time remaining until the incident impacts the business. Available options:
| ||||||
| Priority | Y | Identifies the importance of the incident. This field is populated automatically based on the value of the Impact and Urgency fields. Available options:
See the Priority Management article to learn more. | ||||||
| Attention Required | N | Select the checkbox to notify the line manager of the assigned group or user. | ||||||
| Major Incident | N | Select the checkbox to create a major incident. | ||||||
| Infrastructure Incident | N | Select the checkbox to create an infrastructure incident. When a record is saved, the field is read-only. | ||||||
| Followers List | N | Contains a list of users subscribed to receive notifications about this incident. This field is populated automatically.
|
Create an infrastructure incident
An infrastructure incident is an incident created Infrastructure incident is an incident that is raised not on behalf of end-user, but by service agents of the 1st or the 2nd level levels or by the integrated monitoring system.
| Tip |
|---|
Role required: ITSM_agent or admin. |
To create an infrastructural an infrastructural incident, complete the steps as described above, but turn on and select the checkbox " Infrastructure Incident".
In this caseWhen Infrastructure Incident is selected, the choice list in the Contact type field will be changed. The options will be:
the Contact Type field is changed:
- Monitoring
- 1st level
- 2nd level
| Info |
|---|
In practice, incidents with the Contact type = monitoring are created by Type set to Monitoring are created by an integrated monitoring system automatically. |
Create a major incident
A major incident is the an incident of the highest - impact , and highest - urgency incident. It affects a large number of users, depriving them of vital business functions. Major incidents have a separate procedure with shorter timescalestime scales. Generally, major incidents require a large number of people of the different various hierarchy levels to be involved.
To create a major incident, complete complete the steps as described above, but turn on and select the checkbox " Major Incident".
After creating it, a new tab '', Chronology" will be displayed after the "Closure information" tab.
Inquiry to Incident transformation
, will be displayed next to the Related Records tab.
| Note |
|---|
When the checkbox Major Incident is selected, the Impact field value changes to Very High. |
Creating an end-user incident via the Self-Service Portal Anchor portal creation portal creation
| portal creation | |
| portal creation |
To create an Incident, follow the steps below:
- Navigate to your Self-Service Portal main page.
- Click the Create Incident block and fill in the fields.
- Click Save.
New Incident form fields
| Field | Mandatory | Description |
|---|---|---|
| Urgency | Y | Specify the urgency of the request. Typically, it is evaluated based on the time remaining until the incident impacts the business. Available options:
|
| Subject | Y | Add a brief description of the incident. |
| Description | N | Add a detailed description of the incident. |
You can track the work process on the My Tickets page. To open the record of the incident, complete the following steps:
- In the header, navigate to Cabinet → My Tickets.
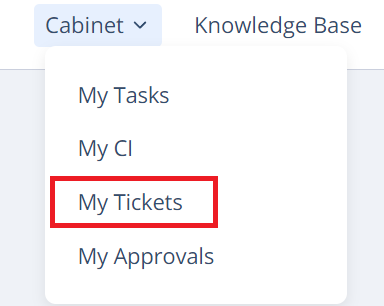
- Click My Incidents on the left.
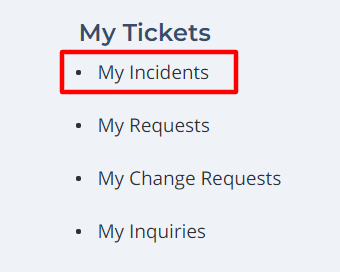
- Check the state of the created incident.

Also, you can see more information about the incident by clicking the number.
User query to Incident transformation Anchor transformation transformation
| transformation | |
| transformation |
| Tip |
|---|
Role required: incident_manager. |
A user query Inquiry is a higher-level entity than the Incidentan incident. It can be converted to the into a request of the other another type, including Incident.
To made a transformation "Inquiry → Incident", please complete the following steps:
type "incident." The conversion is available only through the agent interface.
- Navigate to User Queries → All User Queries.
- Open the user query
- Navigate to the Inquiries → All;
- Open the inquiry you need to convert;
- Press the Create Incident form button at the top of the page;
- .
- Click the Incident button in the top-right corner of the form.

![]()
| Info |
|---|
The Create Incident button may might be disappeared absent if the incident was has already created from this inquiryuser query. In this case, the incident and the inquiry will be linked. The incident number will be displayed in the inquiry form (the Related Ticket field), and the Inquiry number will be displayed in the Related Records tab of the Incidentuser query are linked to each other:
|
| Table of Contents | ||||||
|---|---|---|---|---|---|---|
|