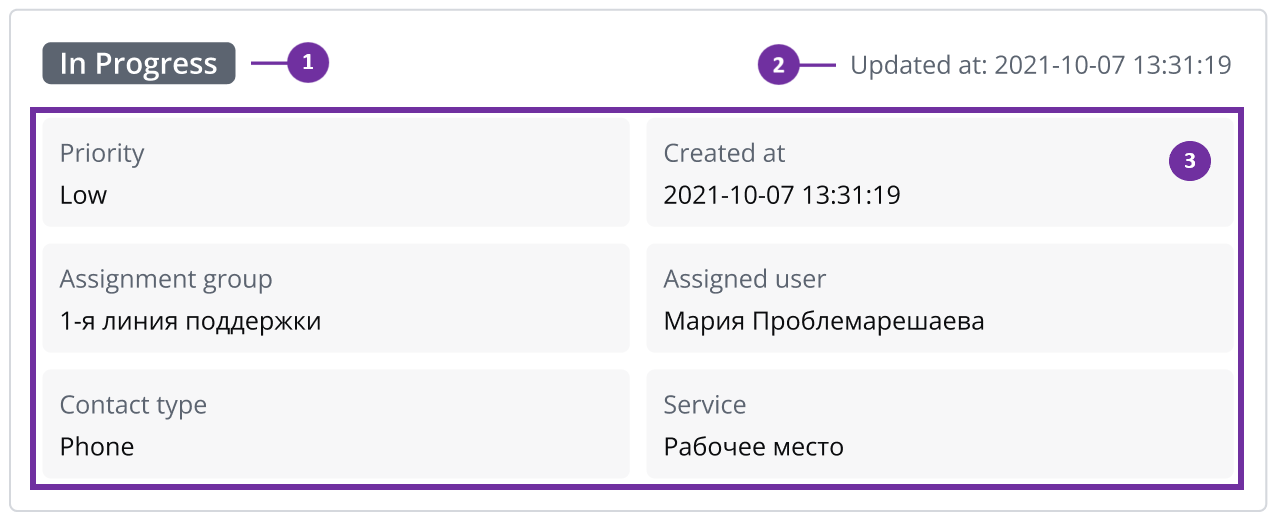
SimpleOne provides several comprised widgets for displaying read-only information on user queries, incidents, problems, requests, and change request forms. One of them is the Static Task Information widget.
This widget retrieves information from the current record. By default, the following fields are displayed:
- State
- Number
- Assigned User
- Updated at
- Created at
| Info |
|---|
The Static Task Information widget does not display empty fields. If the Assigned User is not yet defined, the field will be hidden. |
Widget appearance
You can reorder widgets and fields using the Form Layout functionality.
To learn how to change the order of fields within the Static User Information widget, refer to the next section.
Configuring widget set of fields
| Tip |
|---|
Role required: admin. |
To change the set of displayed fields, complete the following steps:
- Navigate to Portal Structure → Widgets.
- Open the record titled Static Task Information.
In the Server Script field, find the line
Code Block language js theme Eclipse title Server Script < , select Configure → Table.
 - In the Related Lists area, open the Columns tab.
- Using the search boxes or the Condition Builder, find the column you need.
- Copy the system name from the Column Name column.
- Click Save or Save and Exit to apply changes.
Adding a widget to custom ITSM essence
To add the Static Task Information widget to a custom ITSM table, extended from the ITSM Task table, perform the following steps:
- Open the custom table form.
- In the hamburger menu, select Configure → Form → Layout.
- From the Available box, move the Static Task Information widget to the Selected box.
- Click Save.
Configuring the widget fields
Users with the administrator role can manage the location and the content of the fields located in the Static Task Information widget. Namely, it is possible to place the selected fields in the exact order within the specified line.
To change the widget layout:
- In the hamburger menu of the form where the widget is located, go to Configure → Form → Layout.
- In the Selected box, select the widget you need to configure.
- А window with the Schema Option Values field appears on the right. Change the order and the content of the fields in each raw of the widget. If a field has no value, it is filled with the 'not set' placeholder.
For example, the following settings refer to setting three fields in the first line and two fields in the second line.
| Code Block |
|---|
<![CDATA[[["business_phone","timezone_id","location"],["department","work_schedule"]] |
| Info |
|---|
Each line is considered to be a cell that can be divided into numerous columns depending on the number of fields set. Thus, each line, regardless of the number of the columns it has, takes the full width of the widget. |
Unlike the previous version of the widget, the Updated at information is now located at the top right corner of the Static Task Information.
For the displays with the resolution less than 576px, there is a toggle enabling Show more and Hide modes.
| Table of Contents | ||||||
|---|---|---|---|---|---|---|
|